Cute gifts for under 50 cents?!?

Every year my gift list seems to grow.  Teachers, friends, neighbors, co-workers, mailman, the lady I wave to that walks her dog every day!  I love giving gifts, it's my love language, but my income doesn't necessarily match my desire for lavish gift-giving!  :0)  So I plan ahead and do what I can, hit after Christmas sales, shop year round, and now scour pinterest for cute, cheap, gift ideas to show people I care without going into debt.  Here is an idea I saw in a magazine years ago that I am using for some of those on my gift list this year.  (Hopefully none of them see this before I give them out)   When I averaged out the cost, it came to about 45 cents a piece.
Here are the materials you will need:
Clear or pearl-like ornaments
White or colored paper shred
Your choice of ribbon
Letter stickers
Here is a closer shot of the letter stickers I chose, this was after I made them so some letters are missing.  I loved the black against the white shred.
Directions are simple.  Stuff the shred into the ornament, stick on the letter and tie with a ribbon for hanging.  Easy and cute!
And where to I keep all these ornaments until I give them out??
On a cupcake stand of course!  :0)
Happy gifting!!

I'm getting a vision.....

I have always loved to decorate my home.  No matter if it was my dorm room in college, the small two bedroom apartment my husband and I started out in, or the home we now share with our two kids.  There is something about decorating that makes things feel complete to me.  The process of coming up with an idea and then seeing it through to fruition is challenging and fun.  It is definitely something I wouldn't mind doing for a living.  My friend Kim asked me if I would like to come to her home and start the process of organizing and possibly some decorating as well.  Decorating and organizing for someone other than myself or my mom is something I have never tried and I am super excited to see how everything turns out.  We decided the first thing we would work on would be her mantel for Christmas.  We took a trip to Hobby Lobby (LOVE)  and a few hours later had her Christmas mantel all ready for the season. 

Thanks Kim for giving me the oppurtunity to do this - I had a blast!


'Fall'ow me....(hehehe)

Here it is four days before Halloween and I am just posting some of my fall/Halloween decorations but as they say better late than never I suppose!
We will start with my daughter's room - she likes decorating for seasons almost as much as I do.
I made the BOO letters a few Halloween's ago, just the cardboard letters from Hobby Lobby, some scrap paper and of course Modge Podge!  Super easy - I painted the edges which made it even easier.


Here is my entertainment center in the living room - OH how that cord hanging from the TV is a thorn in my side!!!  My husband says I just need to get a longer one and he can hide it through the wall....we shall see!  ;)
Here is a closer look at the pumpkins.


Next up, the fireplace.  It's kind of weird to see your home in pictures, like that candle on the right looks yellow but in real life it's the same as the others.  Maybe it's my mad picture taking skills, ha!  Anyway, we have yet to buy gas logs or use real logs because we keep hearing arguments against both and can't make a decision!!  Any opinions would be welcome before it gets too cold around here!
Here are just a few things in my kitchen.

and the top of my frig...

And finally my cutie jack-o-lantern I bought at Sam's a few years ago.
I just added the ribbon to the handles, it makes me smile when I hand out candy to the kiddos!
Have a fun and safe Halloween!

Fall in every nook and cranny


This chalkboard is in my laundry room on a wall that very few people look at, including my family. 
But I do and it makes me smile!  :)

CRAZY hair day!!

My kids LOVE crazy hair day!  It's one of the few days of howdy week that my son will participate in.  This year we went all buggy.  I saw the idea on a blog a long time ago so I can't remember where (figures)!
I went to Dollar Tree and bought a package of plastic bugs. 
These guys gave me the least heebie geebies out of all of them.
I hot glued them to his sister's barrettes (that's the pink and yellow you see, haha)
And you have your very own bug garden.....boy smiling creepily not included

Boo!!

I cannot remember where this original idea came from.  All I know is I thought it was so cute but never got around to doing it until I saw the glass domes at a garage sale.  So props to whomever came up with this great idea.
Yes that's a ceiling fan light dome and a black sharpie.  Hehe!
and I don't know why the wall looks so dirty but I promise you it's not!!

I put a battery powered tea light in it and it welcomes guests into the kid's bathroom.
Super simple. Super cute!
Have a bootiful Halloween!

Tip o' the day!

Toast crumbs.....pet peeve.  Toast crumbs that fall out of the bottom of the toaster.....bigger pet peeve.  So here is my answer to the problem.  Cookie sheet. 
Slide into cabinet

No more crumbs on the counter!  Now toast sweat I can do nothing about :)

Furniture re-do(s)

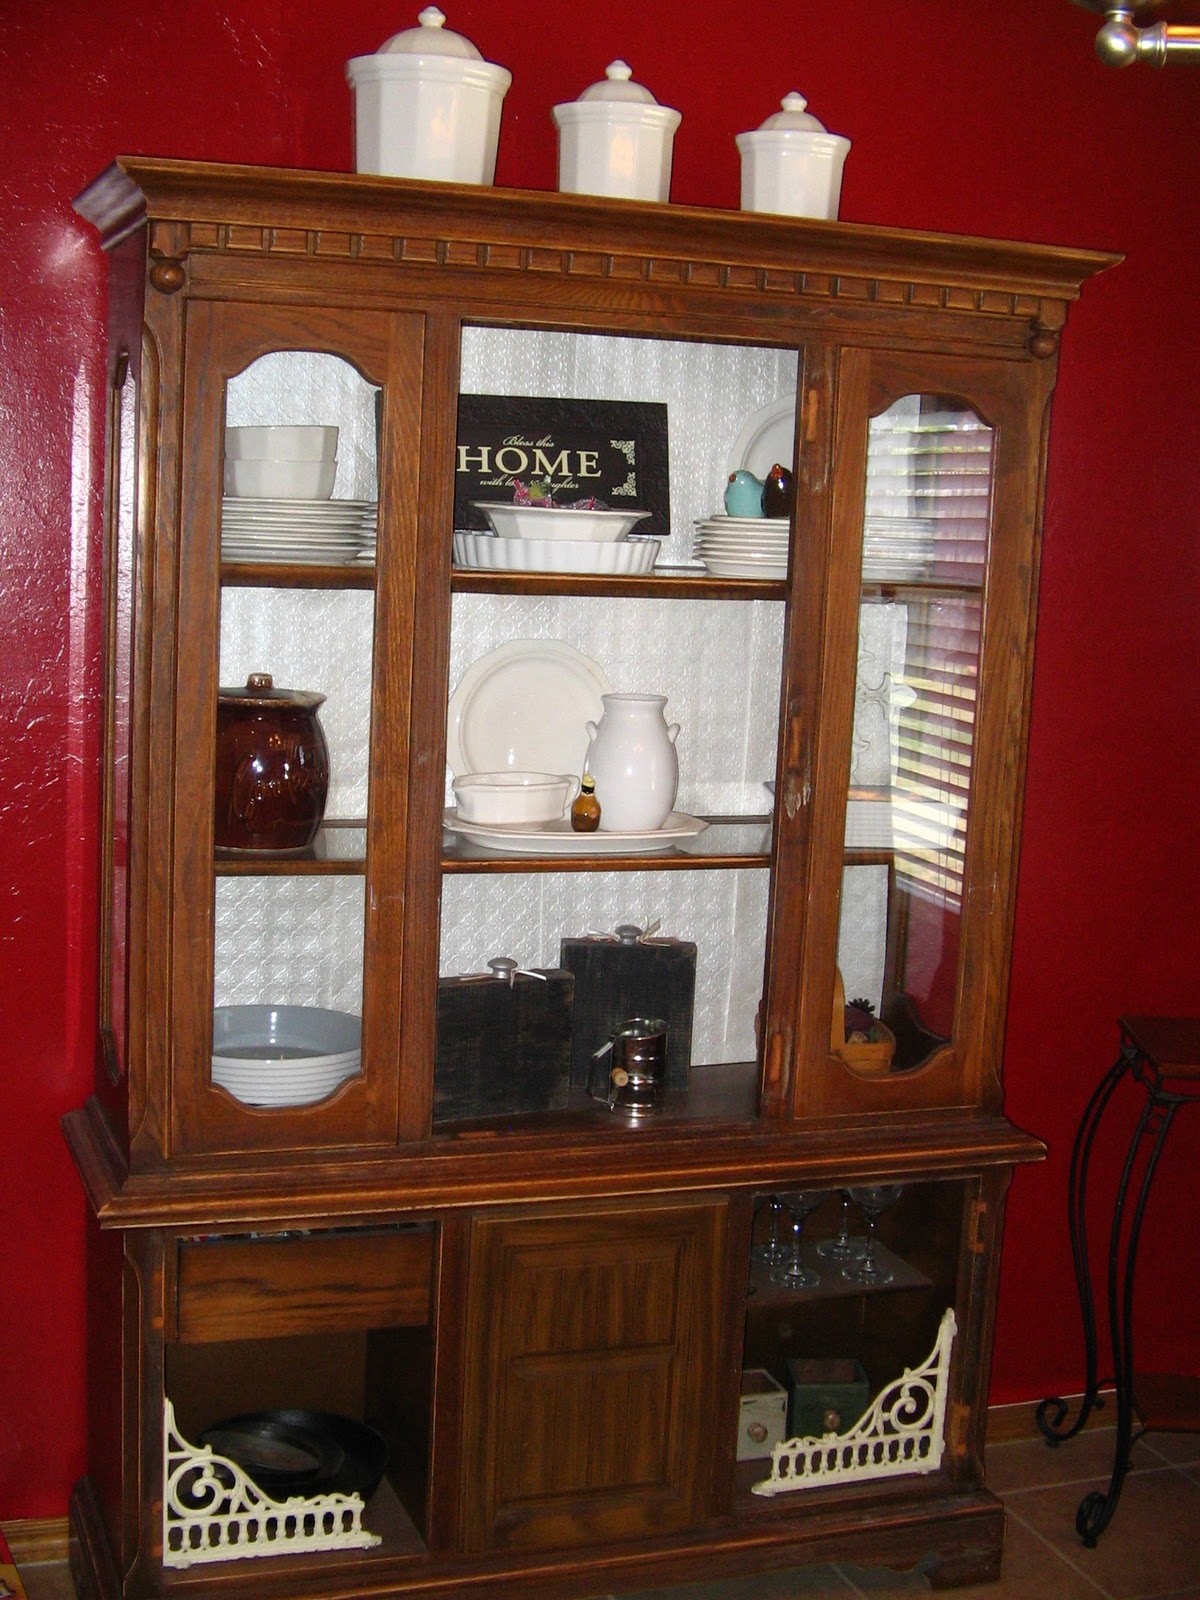
I have not posted in FOREVA!!  I've been busy, busy, busy....too busy for my taste.  I'm still trying to get my bearings on my schedule and priorities BUT I'm getting there slowly but surely!  Anyway, I did spend a weekend sanding and priming and painting and sealing a couple pieces of furniture and I'm pretty happy with how they turned out.  First up, my grandma's hutch.  I've been wanting to paint this puppy for about a year and a half, you see how quick I am.  Regardless, I finally did it and here is the before:

I had already taken of the glass doors in the middle and all the hardware but I really wanted it black. 
Here it is after the primer:

First coat of black:


And here is the finished product:

I didn't sand it because of all the nooks and crannies, so I just put on a coat of primer, two coats of paint and a coat of polyurethane.  I was originally going to antique it but liked the gloss black like it was.

Next up, the coffee table I took from the side of the road.  That's right - a guy set it out on his curb and when I drove by and saw it I asked him if I could have it.  He said yes and even helped me load it in the car!  I forgot to take a picture until I had already started sanding it but you will get the idea.
The lines on the tarp are from painting my shutters, ha!
I used my handy dandy sander that I got for Mother's Day a few years ago, best. gift. ever.
After the primer

After the first coat of black - it took two
After two coats of black, I sanded some spots, put stain over them to antique it then put on a coat of polyurethane on it too.
So here it is today:
You will have to forgive me my pathetic camera.
I tried another to show the antiquing, not great but you get the idea.
So that's it for painting furniture....until I start my room!

My Obsession With Black

I love using black as an accent color.... pretty much anywhere in my house.  I used it in my daughter's room.

 
I used it on the front of my house.

And in my living room
In fact I think my kid's bathroom is the only room that DOESN'T have black!
I decided over the weekend that I wanted the inside of my front and back door to be black as well.
I forgot to take the "before" picture until after I started!  haha
Here's how they turned out.

I think I like it!
And while I had the brushes and drop sheet out, I put some chalkboard paint on the desk in our office which I've been wanting to do for a while.  I will be showing some more pictures of that room makeover soon.

My son had tell me that the plays weren't finished - LOL
I thought I was doing good to use the x's and o's. 

Spring (or Summer) Cleaning

As I mentioned in a previous post, my kiddos were gone for a week to visit my parents in Kansas.  In between hangin' out with my hubby and episodes of Weeds, I deep cleaned our house.  I purposely waited for the summer because I knew the kids would be gone and I could knock it out in a few days.  One of the new products I tried was
I LOVE this stuff!!  I have used the old Murphy's where you had to have a bucket of water and a rag.  This is sooo much easier and you don't have to wipe it off after you're done.  Just spray on the rag and wipe down the surface and you're good to go! 
I used it on my cabinets, trim work, doors, kitchen table.  It worked great!!
And best of all - no more buckets!
I feel so much better now that the house has been spruced up from top to bottom and I can focus on my planning for all the upcoming fun in the fall!!

Paint makes everything better!

My entire house was painted with the dull, off-white, FLAT painter's paint when we moved in.  I have painted every room in the house now except my own.  But there are still the little things to paint that get on my nerves.  One being the inside of my pantry.  Normally this would not seem like a big deal but this is what it looked like when we moved in!

Gross!!!! And this was AFTER I cleaned it!
Needless to say, I really wanted to paint it but it was one of those things that got pushed to the back burner to do when I had "more time". 
The other night I went searching through my containers of leftover paint to try to find a color that would work.  Lime green or blue were not on the top of my list!
I ended up finding the color I recently painted our office (pics of that to come later).  My husband is a huge 49er fan and I promised him that if we ever had four rooms, I would make one a 49er room.  As hard as it was not to take over and make everything pink and shabby chic, I kept my promise and painted the walls a color called Kenya.
I had plenty to use and bonus, the color actually works well with my kitchen.
Ahhhh, that's much better!!!
It never ceases to amaze me what you can do with a can of paint and 45 minutes!